A pattern can completely change the energy of a room. It can make a space feel more playful, sophisticated, cozy, or modern. While a patterned rug or accent chair makes a statement, there’s something uniquely impactful about bringing that design element to your windows. Roman shades provide the perfect flat canvas to showcase a beautiful print, turning a simple window into a work of art. Selecting the right roman shades pattern is a deliberate design choice that injects personality and pulls your decor together. In this guide, we’ll explore the world of patterns, from timeless stripes to bold botanicals, helping you find a design that not only covers your window but truly completes your room.
Key Takeaways
- Start with a solid foundation: Your fabric choice controls the room’s light and privacy, while the pattern’s scale should be proportional to your room’s size to create a harmonious look.
- Successful DIY is all in the preparation: To achieve a professional-looking shade, always pre-wash your fabric, measure your window meticulously, and plan your pattern’s placement before you begin sewing.
- Choose your path based on your priorities: A DIY project is great for creative control and potential savings; however, opt for custom shades when you want a guaranteed perfect fit and a completely stress-free experience.
What Are Roman Shades?
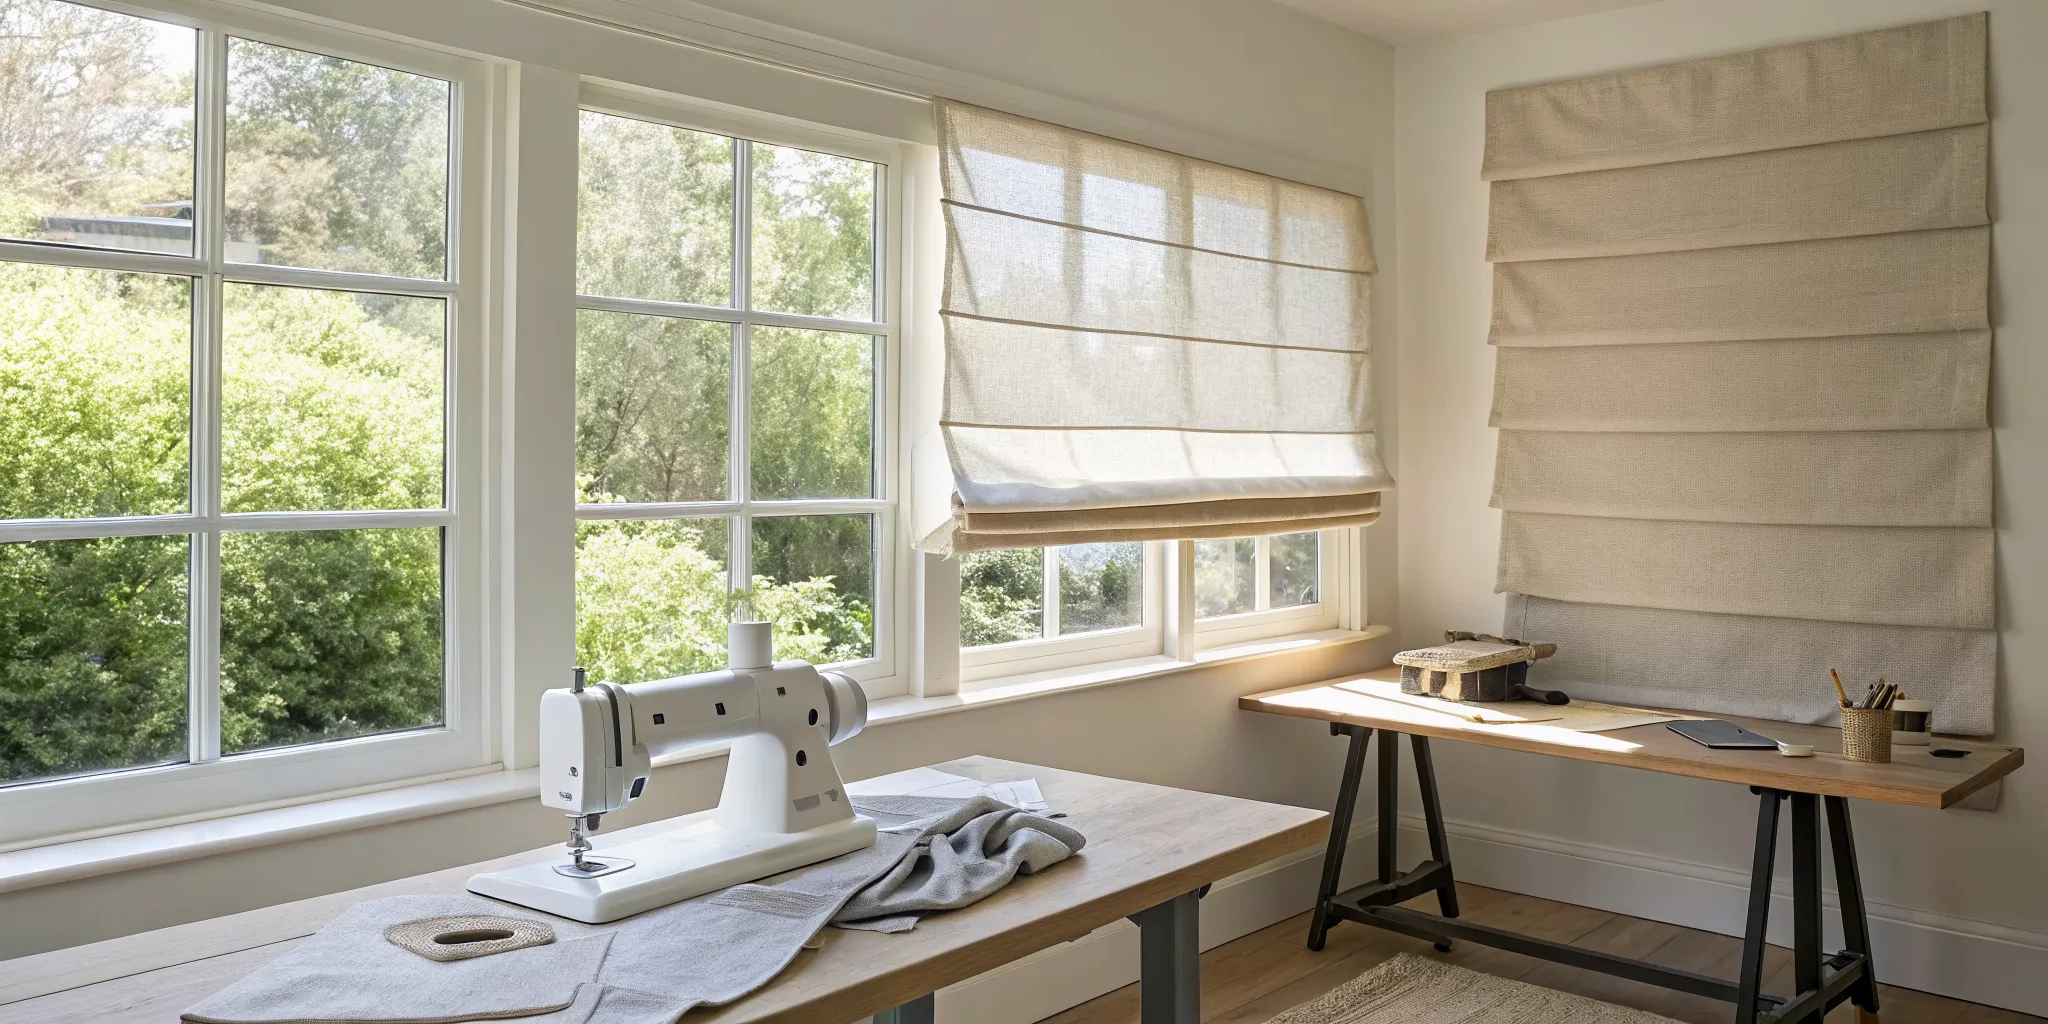
If you love the soft, elegant look of drapes but want the clean functionality of a shade, Roman shades are the perfect solution. These classic window treatments are made from a single piece of fabric that stacks up in neat, horizontal folds when you raise it. Unlike a simple roller shade that disappears at the top of the window, a Roman shade creates a beautiful, decorative valance with its soft pleats, adding texture and dimension to your room even when it’s fully open.
Their tailored appearance makes them incredibly versatile, fitting in with everything from modern minimalist decor to cozy, traditional styles. Because they are fabric-based, you have an endless world of colors, textures, and patterns to choose from. This makes them a fantastic way to introduce a specific design element into your space. Whether you’re looking for a bold statement or a subtle touch of elegance, shades offer a custom look that feels both polished and inviting.
Roman Shades vs. Blinds and Roller Shades
While they all cover your windows, Roman shades, blinds, and roller shades offer very different aesthetics and functions. Traditional blinds have horizontal or vertical slats that you can tilt for precise light control. This is highly functional, but the look is more rigid and structured. Roller shades are even simpler, consisting of a single sheet of material that rolls up into a tube at the top of the window, providing a very minimalist, flat appearance when down.
Roman shades strike a balance between these two. They are made from a single piece of fabric like a roller shade, but they fold up into soft, cascading pleats instead of rolling away. This gives them a much more luxurious and decorative feel, adding the softness and texture of drapery without the extra bulk.
Why Choose a Patterned Roman Shade?
Choosing a patterned Roman shade is like hanging a piece of art in your window. It’s a fantastic opportunity to inject personality and style into your space. A pattern can introduce a new color palette, tie together existing decor elements, or simply serve as a stunning focal point. From subtle geometrics and classic stripes to bold florals and abstract designs, the options are truly limitless. You can see how different patterns transform a space in our gallery.
Beyond their beauty, patterned Roman shades are workhorses. They provide excellent light control and privacy, and the fabric you choose can determine whether the room feels bright and airy or cozy and dark. A pattern can also help hide minor dust or smudges, making them a practical choice for busy households.
Popular Patterns for Roman Shades
Choosing a pattern is one of the most exciting parts of designing your Roman shades. The right print can tie a room together, add a pop of personality, or create a subtle, textured backdrop. While a DIY project gives you endless creative freedom, the sheer number of options can feel a bit overwhelming. Don’t worry, I’ve been there. Let’s walk through some of the most popular pattern styles to help you find the perfect fit for your space. From bold and modern to soft and classic, there’s a pattern out there that will make your windows the star of the show.
Geometric
If you love clean lines and a modern aesthetic, geometric patterns are a fantastic choice. These designs feature repeating shapes like chevrons, diamonds, or Greek keys, adding a contemporary touch to any room. They are incredibly versatile; a simple, large-scale pattern can feel minimalist and chic, while a more complex, smaller design can create a dynamic and energetic vibe. As The Spruce notes, the range of geometric designs gives you plenty of options to match your personal style. They work beautifully in living rooms, offices, or any space that could use a touch of structured elegance.
Floral and Botanical
There’s a reason floral and botanical prints are timeless. They bring the beauty of the outdoors inside, creating a fresh and inviting atmosphere. These patterns can completely change the feel of a room, from a delicate, small-scale floral that adds a romantic touch to a bedroom, to a bold, oversized palm leaf print that makes a statement in a sunroom. As the experts at House Beautiful suggest, floral patterns are perfect for softening a space and adding warmth. Whether your style is traditional, bohemian, or somewhere in between, a botanical print can breathe life into your decor.
Stripes and Plaids
For a look that’s classic and always in style, you can’t go wrong with stripes or plaids. These patterns offer a sense of order and structure that is both comforting and visually interesting. Vertical stripes can create the illusion of height, making your ceilings feel taller, which is a great trick for smaller rooms. Plaids, on the other hand, can introduce a cozy, rustic, or preppy feel, depending on the colors and scale. According to Better Homes & Gardens, these versatile patterns work well in almost any setting, from a traditional dining room to a modern family room.
Abstract and Textured
If you want your Roman shades to be a true work of art, consider an abstract or textured pattern. These designs move beyond traditional motifs, often using bold colors, unique shapes, and painterly strokes to create a stunning focal point. An abstract pattern can add a layer of sophistication and intrigue to your decor. As Elle Decor highlights, these designs are excellent for adding depth and dimension to a room. A textured fabric with a subtle, woven-in pattern can also provide visual interest without overwhelming the space, offering a great middle ground between a solid and a bold print.
The Case for Solid Colors
While patterns get a lot of attention, never underestimate the power of a solid color. Solid Roman shades offer a clean, sophisticated, and incredibly versatile look that can anchor any room. They provide a beautiful backdrop that allows other elements in your decor, like artwork or furniture, to shine. A solid color doesn’t have to be boring; you can choose a rich jewel tone for a dramatic effect or a soft neutral for a calming, serene feel. Plus, as Good Housekeeping points out, solid fabrics are practical and tend to be more forgiving over time, making them a durable and timeless choice for any home.
Choosing the Best Fabric for Your Shades
The pattern gets all the attention, but the fabric you choose is the real hero of your Roman shade. It determines how your shade hangs, how it filters light, and how well it holds up over time. Making the right choice here is the key to creating a shade that looks beautiful and functions perfectly in your space. Let’s walk through the most common options so you can pick the perfect material for your project.
Natural Fabrics: Linen, Cotton, and Silk
Natural fabrics bring a timeless, organic feel to any room. Linen is a fantastic choice for a relaxed, textured look; its natural durability means it will last for years. Cotton is incredibly versatile and comes in countless patterns, making it a go-to for many DIY projects. It’s also generally easy to clean and care for. For a touch of luxury, silk offers a beautiful sheen and an elegant drape. Just remember that silk is more delicate and can be damaged by direct sunlight, so it’s best to pair it with a protective lining. These materials can give your windows a high-end, custom feel, similar to our professionally crafted shades.
Synthetic Fabrics: Polyester and Blends
If durability is your top priority, synthetic fabrics are your best friend. Polyester is a workhorse material that resists fading, wrinkling, and moisture, making it an excellent option for sunny windows in Riverside County or humid areas like kitchens and bathrooms. You don’t have to sacrifice style for strength, either. Many synthetic fabrics are designed to mimic the look and feel of natural fibers like linen or silk. Fabric blends, such as a cotton-polyester mix, give you the best of both worlds: the soft feel of cotton with the resilience of polyester. These practical materials are a smart investment for busy homes with kids or pets.
Light-Filtering vs. Blackout Fabrics
Think about how you use the room before you settle on a fabric. Do you want a soft, sunny glow or complete darkness? Light-filtering fabrics are perfect for living rooms and kitchens, as they gently diffuse sunlight to brighten the space while still providing privacy. They cut the glare without making the room feel dark. On the other hand, blackout fabrics are a must for bedrooms and media rooms. They are made with a special lining that blocks nearly 100% of incoming light, helping you sleep better or create a theater-like experience. This level of light control is something we also prioritize in our plantation shutters.
How Fabric Weight Affects the Fold
The weight of your fabric directly impacts how your Roman shade folds when raised. Lightweight fabrics like voile or sheer cotton create soft, billowy folds for an airy, romantic look. Medium-weight fabrics, such as linen and standard cotton, are often the ideal choice because they create crisp, neat folds without being too heavy. Heavier materials like velvet or thick upholstery fabric produce substantial, defined folds but can become bulky. When using a heavy fabric, make sure your lift mechanism is strong enough to handle the weight and that you have enough space for the larger “stack” at the top of the window when the shade is open. You can see examples of different folds in our gallery.
How to Choose the Right Pattern for Your Room
Picking the perfect pattern for your Roman shades is where the real fun begins. This is your chance to add a splash of personality and tie your whole room together. The right pattern can turn a simple window into a stunning focal point, while the wrong one can feel a bit… off. Don’t worry, you don’t need to be an interior designer to get it right. It’s all about thinking through a few key elements: the size of your room, your existing decor, and the overall vibe you want to create.
Think of your fabric as another layer in your room’s design story. Does it whisper or does it shout? Is it playful or sophisticated? By considering how a pattern will interact with your space, you can make a choice that feels intentional and looks beautiful. Whether you’re a seasoned DIYer or just starting out, these tips will help you select a pattern with confidence. And remember, if you’re ever unsure, exploring different shades and styles can provide a world of inspiration. The goal is to find a fabric you’ll love seeing every day, both when the shade is down and when it’s neatly folded up.
Match the Pattern Scale to Room Size
When it comes to patterns, size matters. The scale of your chosen pattern should feel balanced with the scale of your room. A large, bold print can make a dramatic statement in a spacious living room with high ceilings, but it might overwhelm a small powder room or a cozy office nook. On the other hand, a tiny, delicate pattern can get lost in a large, open-concept space, failing to make the impact you want.
As a general rule, match large-scale patterns with large rooms and small-scale patterns with smaller rooms. Also, consider how the pattern will look when the shade is raised. The fabric will stack into neat folds, so think about whether the design will still be visible or if key elements will be hidden.
Coordinate with Your Existing Decor
Your new Roman shades shouldn’t exist in a vacuum; they should feel like a natural part of your room’s ecosystem. Take a look around at your existing decor. What colors, textures, and styles are already in play? Your shades can either blend in or stand out, but they should always coordinate. Pull a secondary color from your area rug, throw pillows, or a piece of art to create a cohesive look.
Think about how the pattern will appear on the finished shade and how it interacts with other elements. If you have a busy, patterned wallpaper, you might opt for a more subtle or solid-colored shade to create balance. For inspiration, browse a gallery of completed projects to see how different patterns work in real homes across Orange County and Riverside County.
Consider the Room’s Function and Lighting
How you use a room should influence your pattern choice. A bright, energetic pattern with vibrant colors might be perfect for a creative workspace or a kid’s playroom, but it might feel too stimulating for a bedroom designed for rest and relaxation. For serene spaces, consider softer patterns in calming colors like blues, greens, or muted neutrals. The pattern sets the mood, so choose one that supports the room’s primary function.
Lighting also plays a huge role. Roman shades are fantastic for managing how much sunlight enters a room. A pattern printed on a light-filtering fabric will have a soft, ethereal glow when the sun shines through, while the same pattern on a blackout fabric will appear more saturated and bold.
Match Patterns to Your Decor Style
Every home has a unique style, and your window treatments are a perfect opportunity to reinforce it. The pattern you choose can instantly signal whether your home is modern, traditional, bohemian, or something in between. For a sleek, contemporary look, consider geometric shapes, clean lines, or abstract designs. If your style leans more traditional or farmhouse, classic patterns like florals, botanicals, stripes, or plaids are timeless choices that always feel right.
Don’t be afraid to let your personality shine through. If you love a coastal vibe, a subtle wave pattern or a simple linen stripe can complete the look. For a glamorous, Hollywood Regency feel, an art deco-inspired pattern could be the perfect finishing touch. Your shades are an expression of your taste, so choose a pattern that you truly love.
How to Mix Patterns Like a Pro
Feeling adventurous? Mixing patterns can add incredible depth and character to a room, creating a space that feels curated and unique. The key to success is to follow a few simple guidelines so the result looks intentional, not chaotic. First, vary the scale of your patterns. Combine a large-scale pattern (like on your Roman shades) with a medium-scale pattern (on an accent chair) and a small-scale one (on throw pillows).
Second, stick to a unified color palette. As long as your patterns share a few common colors, they will feel connected. For example, you could mix a floral, a stripe, and a geometric print if they all share shades of blue and white. If you’re feeling hesitant, our design experts in San Diego County and beyond are always here to help. You can contact us for a free consultation to find the perfect combination.
How to Sew a Roman Shade: Step-by-Step
Ready to bring your vision to life? This step-by-step guide will walk you through the process of sewing your own patterned Roman shades. Taking on a DIY project like this is incredibly rewarding, and with a little patience, you can create a beautiful, custom window treatment that perfectly reflects your style. While it requires precision and careful attention to detail, the process is straightforward when you break it down into manageable steps. From gathering your supplies to mounting the final piece, we’ll be here to guide you. The transformation a well-made shade can bring to a room is significant, adding softness, color, and character. Just remember to take your time, measure carefully, and enjoy the creative process. If you get started and feel the project is more than you bargained for, remember that our team is always here to help homeowners in San Diego, Riverside, and Orange County with professional custom shades.
Step 1: Gather Your Materials and Tools
First things first, let’s get organized. Having all your materials and tools ready before you start will make the entire process much smoother. You’ll need your main decorative fabric, a separate fabric liner, a sewing machine, and thread. For the structure and mechanism, gather thin dowel rods, a pulley system, a cord lock for safety and convenience, and small plastic rings. To mount the shade, you’ll need a 1x2 inch wooden board, L-brackets, and the appropriate screws or drywall anchors for your wall. A measuring tape, sharp scissors, and fabric pins are also essential. If you want to add a decorative touch, have some trim and fabric glue on hand.
Step 2: Measure Your Window
This is the most critical step, so take your time and double-check your numbers. The old saying “measure twice, cut once” definitely applies here. Start by deciding if you want your Roman shade to be mounted inside the window frame or outside of it. For an inside mount, measure the exact width and height of the window casing from top to bottom and side to side. For an outside mount, measure the width and height of the area you want the shade to cover, which usually includes the window trim. Add a few inches to each side for better light control and privacy.
Step 3: Choose Inside vs. Outside Mount
The mounting style you choose affects both the look and function of your shade. An inside mount offers a clean, built-in appearance that sits neatly within the window frame. It’s a great choice if you have beautiful window trim you want to show off. However, an outside mount can be more practical in certain situations. If your window frames are too shallow for the hardware, an outside mount is the way to go. It’s also better for blocking more light, as the fabric will overlap the window opening. You can see great examples of both styles in our online gallery to help you decide.
Step 4: Cut and Prep Your Fabric
Now it’s time to cut your fabric. For your main patterned fabric, add four inches to your final desired width and ten inches to the final desired length. This extra material gives you plenty of room for hemming the sides and creating pockets for the bottom bar and top mounting board. For the liner fabric, you’ll want to cut it one inch narrower than your final desired shade width. This ensures the liner won’t peek out from the sides once everything is sewn together. Before you cut, it’s always a good idea to iron your fabric to remove any wrinkles for the most accurate measurements.
Step 5: Align the Pattern
When working with a patterned fabric, this step is key to achieving a professional, high-end look. Before you make any cuts, lay your fabric out and think about how the pattern will look on the finished shade. You’ll want to center the most prominent part of the design and make sure any lines or repeating motifs are straight. Consider how the pattern will appear when the shade is both fully extended and folded up. Taking a few extra minutes to plan the pattern placement will make a huge difference in the final result, ensuring your shade looks intentional and polished, much like the clean lines of classic plantation shutters.
Step 6: Sew the Panels and Pockets
With your fabric cut and pattern aligned, you can start sewing. Begin by hemming the sides of your main fabric and liner. Then, lay the main fabric face down with the liner on top and sew them together, leaving the top open. Next, you’ll create the pockets for your dowel rods on the liner. These rods are what give the Roman shade its structure and help it fold neatly. Starting from the bottom hem, fold the liner up about three-quarters of an inch and sew a straight line to create the first pocket. Continue creating pockets every 8 to 12 inches up the length of the shade.
Step 7: Attach the Hardware
Now you’ll prepare the mounting board. This 1x2 inch piece of wood will hold the shade and all its operating hardware. Start by screwing the pulleys onto the board, placing one on each side where your cords will run. If you’re using a cord lock for easy operation, you can often align its screw hole with one of the pulley’s screw holes to secure both at once. Attach the main fabric to the board using a staple gun, ensuring it’s straight and taut. If you find that handling the hardware is becoming a hassle, remember that our mobile services can bring professional installation right to your door.
Step 8: Mount Your New Shade
You’re on the home stretch! The final step is to mount your completed Roman shade. You’ll use small L-brackets to secure the mounting board to the wall. For an outside mount, position the brackets on the wall just above your window trim. For an inside mount, attach them to the top of the window casing. Use a level to ensure the board is perfectly straight before you screw it in. If you aren’t drilling into a wall stud, be sure to use drywall anchors for a secure hold. Once mounted, thread the cords, test the mechanism, and admire your beautiful, handmade window treatment.
Common DIY Mistakes to Avoid
Embarking on a DIY Roman shade project is exciting, but a few common slip-ups can turn your creative vision into a frustrating experience. I’ve been there, and trust me, avoiding these mistakes from the start is the key to a project you’ll be proud of. Let’s walk through the most frequent errors so you can sidestep them and sew a beautiful, functional shade on your first try. Think of this as your friendly guide to a flawless finish, saving you time, fabric, and a whole lot of seam-ripping.
Forgetting to Pre-Wash Your Fabric
It’s tempting to dive right into cutting your beautiful new fabric, but hitting pause to pre-wash it is a non-negotiable step. Most fabrics, especially natural ones like cotton and linen, are likely to shrink the first time they’re washed. If you sew your shade and then wash it later, you could end up with a shade that’s inches shorter than your window. Pre-washing also removes any sizing or chemicals from the manufacturing process, making the fabric softer and easier to handle. Always pre-wash your fabric according to the care instructions before you even think about picking up the scissors. This simple step ensures your finished shade will maintain its perfect size and shape for years to come.
Misaligning the Pattern
When you’re working with a patterned fabric, alignment is everything. A slightly skewed pattern can make the entire window treatment look off-balance and unprofessional. The key is to work slowly and deliberately when cutting your fabric. Lay your material on a large, flat surface and take the time to ensure the pattern is perfectly straight. Pay close attention to the fabric’s grainline and make sure your pattern pieces are aligned with it. This affects how the fabric hangs. For designs with a clear repeat, you’ll want to plan your cuts carefully to ensure the motif looks centered and consistent when the shade is finished.
Taking Incorrect Measurements
The old saying “measure twice, cut once” is the golden rule of any DIY project, especially Roman shades. An inaccurate measurement can result in a shade that’s too narrow, too wide, or simply doesn’t fit in the window frame. To get it right, measure your window’s width at the top, middle, and bottom, and the height at the left, center, and right. Use the narrowest width and shortest height for your calculations. Don’t forget to account for the extra fabric needed for hems, seams, and the pockets for the dowel rods. Double-check all your numbers before making a single cut. It’s a small step that prevents a major headache.
Skipping the Lift Mechanism Test
You’ve sewn a beautiful shade, and it looks perfect. But does it work? Many DIYers get so excited about finishing the sewing that they forget to test the lift mechanism until the very end. Before you complete the final stitching and hang your shade, it’s crucial to test the cords and pulleys. String the cords through the rings or guides and give it a trial run. Does the shade lift evenly? Does it lock in place properly? This is your chance to troubleshoot any issues with the corded lift system while it’s still easy to make adjustments. A functional test ensures your beautiful new shade works as well as it looks.
Pro Tips for a Flawless Finish
You’re so close to the finish line! After all the careful measuring and cutting, the final details are what separate a good DIY project from a great one. These are the little secrets that professionals use to get that crisp, polished look every time. Paying attention to these steps will ensure your new Roman shades look just as beautiful as the ones you see in magazines and operate smoothly for years to come. It’s all about precision and a little bit of foresight.
Sew Straight Lines and Even Seams
This might sound obvious, but its importance can’t be overstated. Straight seams are the foundation of a professional-looking Roman shade. When your lines are perfectly parallel, the shade hangs correctly, the folds are crisp, and the entire window treatment looks balanced and intentional. Take your time with this step. Use a good quality ruler, mark your lines with a fabric pencil, and press your seams flat with an iron as you go. Precision in your sewing process is what creates those clean, structured shades that look so effortlessly chic. Crooked seams can cause the fabric to pucker and pull, preventing the shade from folding up neatly.
Always Test a Fabric Swatch First
Before you commit to cutting up yards of beautiful fabric, always test a swatch. The fabric you fell in love with on the bolt might look completely different hanging in your window. You need to pick a fabric that looks good both when the shade is down and when it’s folded up. Hang a small sample in the window it’s destined for. See how the light from your window interacts with the color and pattern throughout the day. Does it provide the privacy you want? When you bunch it up, does the pattern still look good, or does it become a jumbled mess? This simple test can save you from a major design regret.
Check the Folded Pattern
If you’re working with a pattern, this step is crucial. Think about where the fabric pattern will be on the finished shade when it’s both raised and lowered. Before you make your first cut, lay out your fabric and plan how the folds will interact with the design. You want to showcase the best parts of the pattern, not have them awkwardly cut off or hidden in a pleat. You might want to center a large motif on the main panel or ensure that a geometric pattern aligns perfectly at the seams. This foresight is what gives custom window treatments their high-end feel, and you can see great examples in our gallery.
Secure Dowel Rods for Durability
Dowel rods are the hidden skeleton that gives a Roman shade its structure. How you place them makes all the difference in their function and longevity. For a durable and smooth operation, precision is key. A great rule of thumb is to sew the first pocket for your dowel about five inches from the bottom hem of the shade. Then, space the rest of the pockets about eight inches apart up the length of the fabric. This specific spacing creates those classic, even folds and ensures the shade lifts and lowers without any hitches. It’s this kind of technical detail that our team has perfected over years of experience.
Managing Light and Privacy with Roman Shades
One of the best things about Roman shades is how they perfectly blend form and function. Once you’ve sewn your beautiful new shade, you get to enjoy its practical side: managing the light and privacy in your home. The fabric you choose and how you use the shade can completely change the atmosphere of a room, turning it into a bright, airy space or a cozy, private retreat. Let’s walk through how to get that balance just right.
How Fabric Affects Light Filtering
The fabric you select is the single most important factor in controlling a room’s light. A delicate, sheer linen will invite a soft, diffused glow, while a thicker, tightly woven cotton will block more sun. When you’re picking your material, remember to choose a fabric that looks good both when the shade is down and when it’s folded up. The texture and color will interact with sunlight, so what looks one way on the bolt might look totally different with light shining through it. This is why we offer a wide variety of shades with different fabric options for our clients in San Diego County and beyond.
Choose the Right Opacity for Your Room
Opacity refers to how much light can pass through the fabric. For a living room or kitchen where you want to maintain brightness, a light-filtering fabric is a great choice. It cuts down on harsh glare while keeping the space feeling open. For bedrooms or a media room, you’ll want something with more light control. A room-darkening or blackout fabric, or even adding a blackout liner to your chosen decorative fabric, will ensure privacy and a dark environment for sleeping or watching movies. You can see great examples of how different opacities look in real homes throughout Riverside County in our gallery.
Balance Privacy and Natural Light
Roman shades are fantastic because they offer privacy without forcing you to live in the dark. Unlike heavy drapes, you can easily adjust them to find the perfect equilibrium. Lower the shade just enough to block the view from the street while still letting sunlight stream in from the top of the window. This makes them ideal for street-facing rooms in busy Orange County neighborhoods. If you find that achieving this balance with a standard shade is tricky, you might consider a top-down/bottom-up mechanism. It’s a feature that gives you ultimate flexibility. If you have questions about custom options, you can always contact us for advice.
DIY vs. Custom: Which Should You Choose?
Deciding between a DIY project and a custom-made solution is a classic homeowner’s dilemma. On one hand, the satisfaction and potential savings of creating something with your own two hands are very appealing. On the other, the flawless finish and convenience of a professional job are hard to beat. When it comes to Roman shades, both paths have their merits. The right choice for you depends on your budget, your timeline, and how much you enjoy a good project. Let’s break down the key differences to help you decide.
Comparing the Costs
The most significant factor for many people is the cost. Making your own Roman shades can definitely save you money, especially if you have several windows to cover. You’re primarily paying for fabric and hardware, trading your own time and effort for a lower price tag. However, it’s important to factor in the cost of tools you might need to buy and the possibility of mistakes that require purchasing more material.
Conversely, while custom shades have a higher initial price, they offer great value. You’re paying for expertise, high-quality materials, and a guaranteed perfect fit. At Vineyard Blind & Shutter, we’re committed to competitive pricing, ensuring you get a beautiful, lasting product without the stress. Investing in custom shades means you get it right the first time, with a professional result that enhances your home’s value.
When to DIY Your Roman Shades
If you love a hands-on project and have a sewing machine collecting dust, making your own Roman shades can be a really rewarding experience. You don’t need to be a professional seamstress to get a great result; patience and a willingness to learn are more important. The key to a polished look is precision, especially when measuring your windows and cutting the fabric. Take your time, double-check your numbers, and enjoy the process of bringing your vision to life. This route is perfect for the creative homeowner who wants a truly personal touch in their decor and has the time to dedicate to the craft.
When to Go for Custom Shades
Let’s be honest, not everyone has the time or desire to start a complex sewing project. If your schedule is already packed or the thought of wrestling with fabric and a sewing machine fills you with dread, custom is the way to go. This option is also ideal if you have uniquely shaped or oversized windows that demand a perfect fit. Choosing custom shades eliminates the guesswork and the risk of a DIY project gone wrong.
With a service like ours, you get more than just a shade; you get a complete, stress-free experience. We offer professional measurement and installation throughout San Diego, Riverside, and Orange County, ensuring your new Roman shades look absolutely perfect. You get to choose from a wide selection of high-quality fabrics and patterns, all with the confidence that the final product will be durable, beautiful, and expertly installed.
Related Articles
- Blackout Roller Shades for Windows: A Buyer’s Guide
- How to Choose the Best Indoor Window Shades
- Automatic Blackout Window Shades: A Buyer’s Guide
- Custom Woven Wood Shades: A Buyer’s Guide
- Blackout Roller Shades: A Complete Buyer’s Guide
Frequently Asked Questions
How do I clean my Roman shades? The best way to clean your shades depends entirely on the fabric. For regular upkeep, you can gently vacuum them with a brush attachment or use a duster to prevent dirt from settling. If you have a small spot, you can often treat it with a damp cloth and a bit of mild soap, but always test it on an inconspicuous area first. For a deeper clean, you’ll need to follow the fabric’s specific care instructions; some materials may need to be professionally cleaned to avoid shrinking or damage.
Are Roman shades a good choice for kitchens and bathrooms? You can absolutely use Roman shades in kitchens and bathrooms, but you have to be strategic about your fabric choice. These rooms have higher humidity, so you’ll want to select a material that resists moisture, like a polyester or a synthetic blend. These fabrics are less likely to develop mildew and are easier to wipe clean. It’s also a good idea to make sure the room has proper ventilation to help your shades stay fresh.
How long do Roman shades typically last? A well-made Roman shade can last for many years, often a decade or more. The two biggest factors in its lifespan are the quality of the fabric and the construction of the lifting mechanism. Shades made from durable materials that are protected from constant, harsh sunlight will naturally hold up better. This is why investing in a quality product, whether you make it yourself or order a custom one, really pays off in the long run.
Are Roman shades safe for homes with children and pets? This is such an important question. Traditional shades with long, dangling cords can pose a significant safety risk for children and pets. Thankfully, modern Roman shades come with much safer options. We strongly recommend choosing a cordless lift system, which allows you to raise and lower the shade with a gentle push or pull. Motorized shades that operate with a remote or smart device are another excellent, cord-free choice that provides both safety and convenience.
I’m not sure if I should DIY or order custom shades. What’s the deciding factor? The choice really comes down to your time, your confidence in your sewing skills, and the final result you’re looking for. If you genuinely enjoy hands-on projects, have the time to dedicate to careful work, and want a truly personalized touch, the DIY route can be incredibly rewarding. However, if you have tricky windows, want a guaranteed professional finish without the hassle, or simply prefer to have an expert handle it, ordering custom shades is the best path. It saves you time and ensures a perfect fit and flawless function from day one.